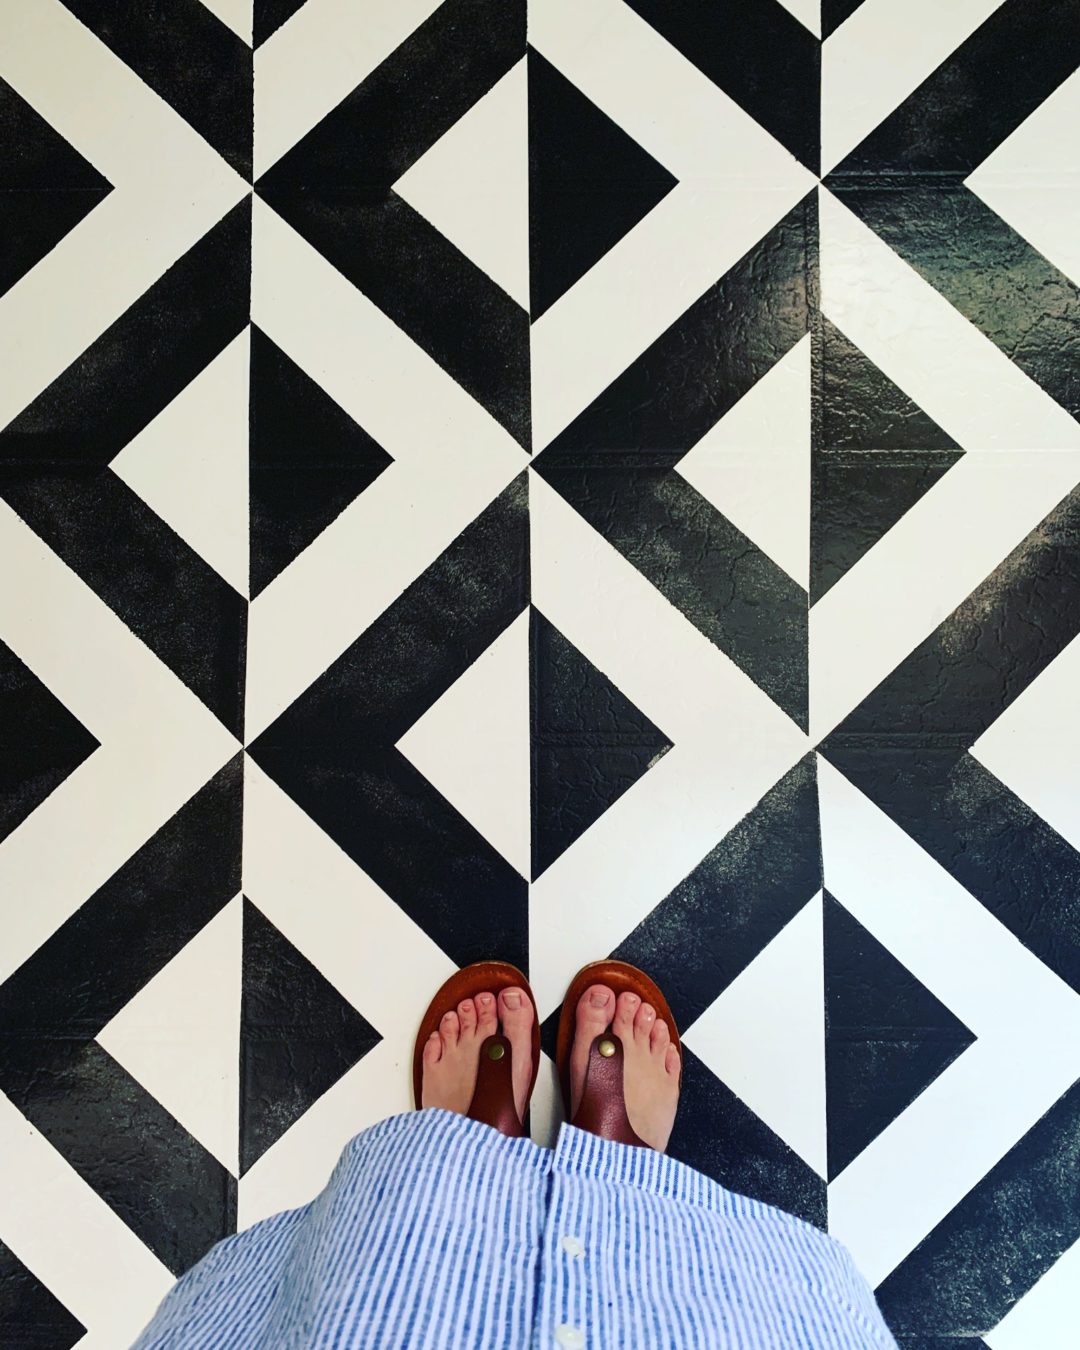
Do you have a place in your home where you feel like you can be brave with the décor? Maybe your kids’ rooms, a basement, or an old tile floor where you can experiment with a trendy color or a crazy DIY project? My laundry room in our 1985 fixer upper was the perfect place to experiment with a bold pattern, so I painted my linoleum floor!
Scroll down for instructions, recommended products, and a template to paint your tile or linoleum floor!
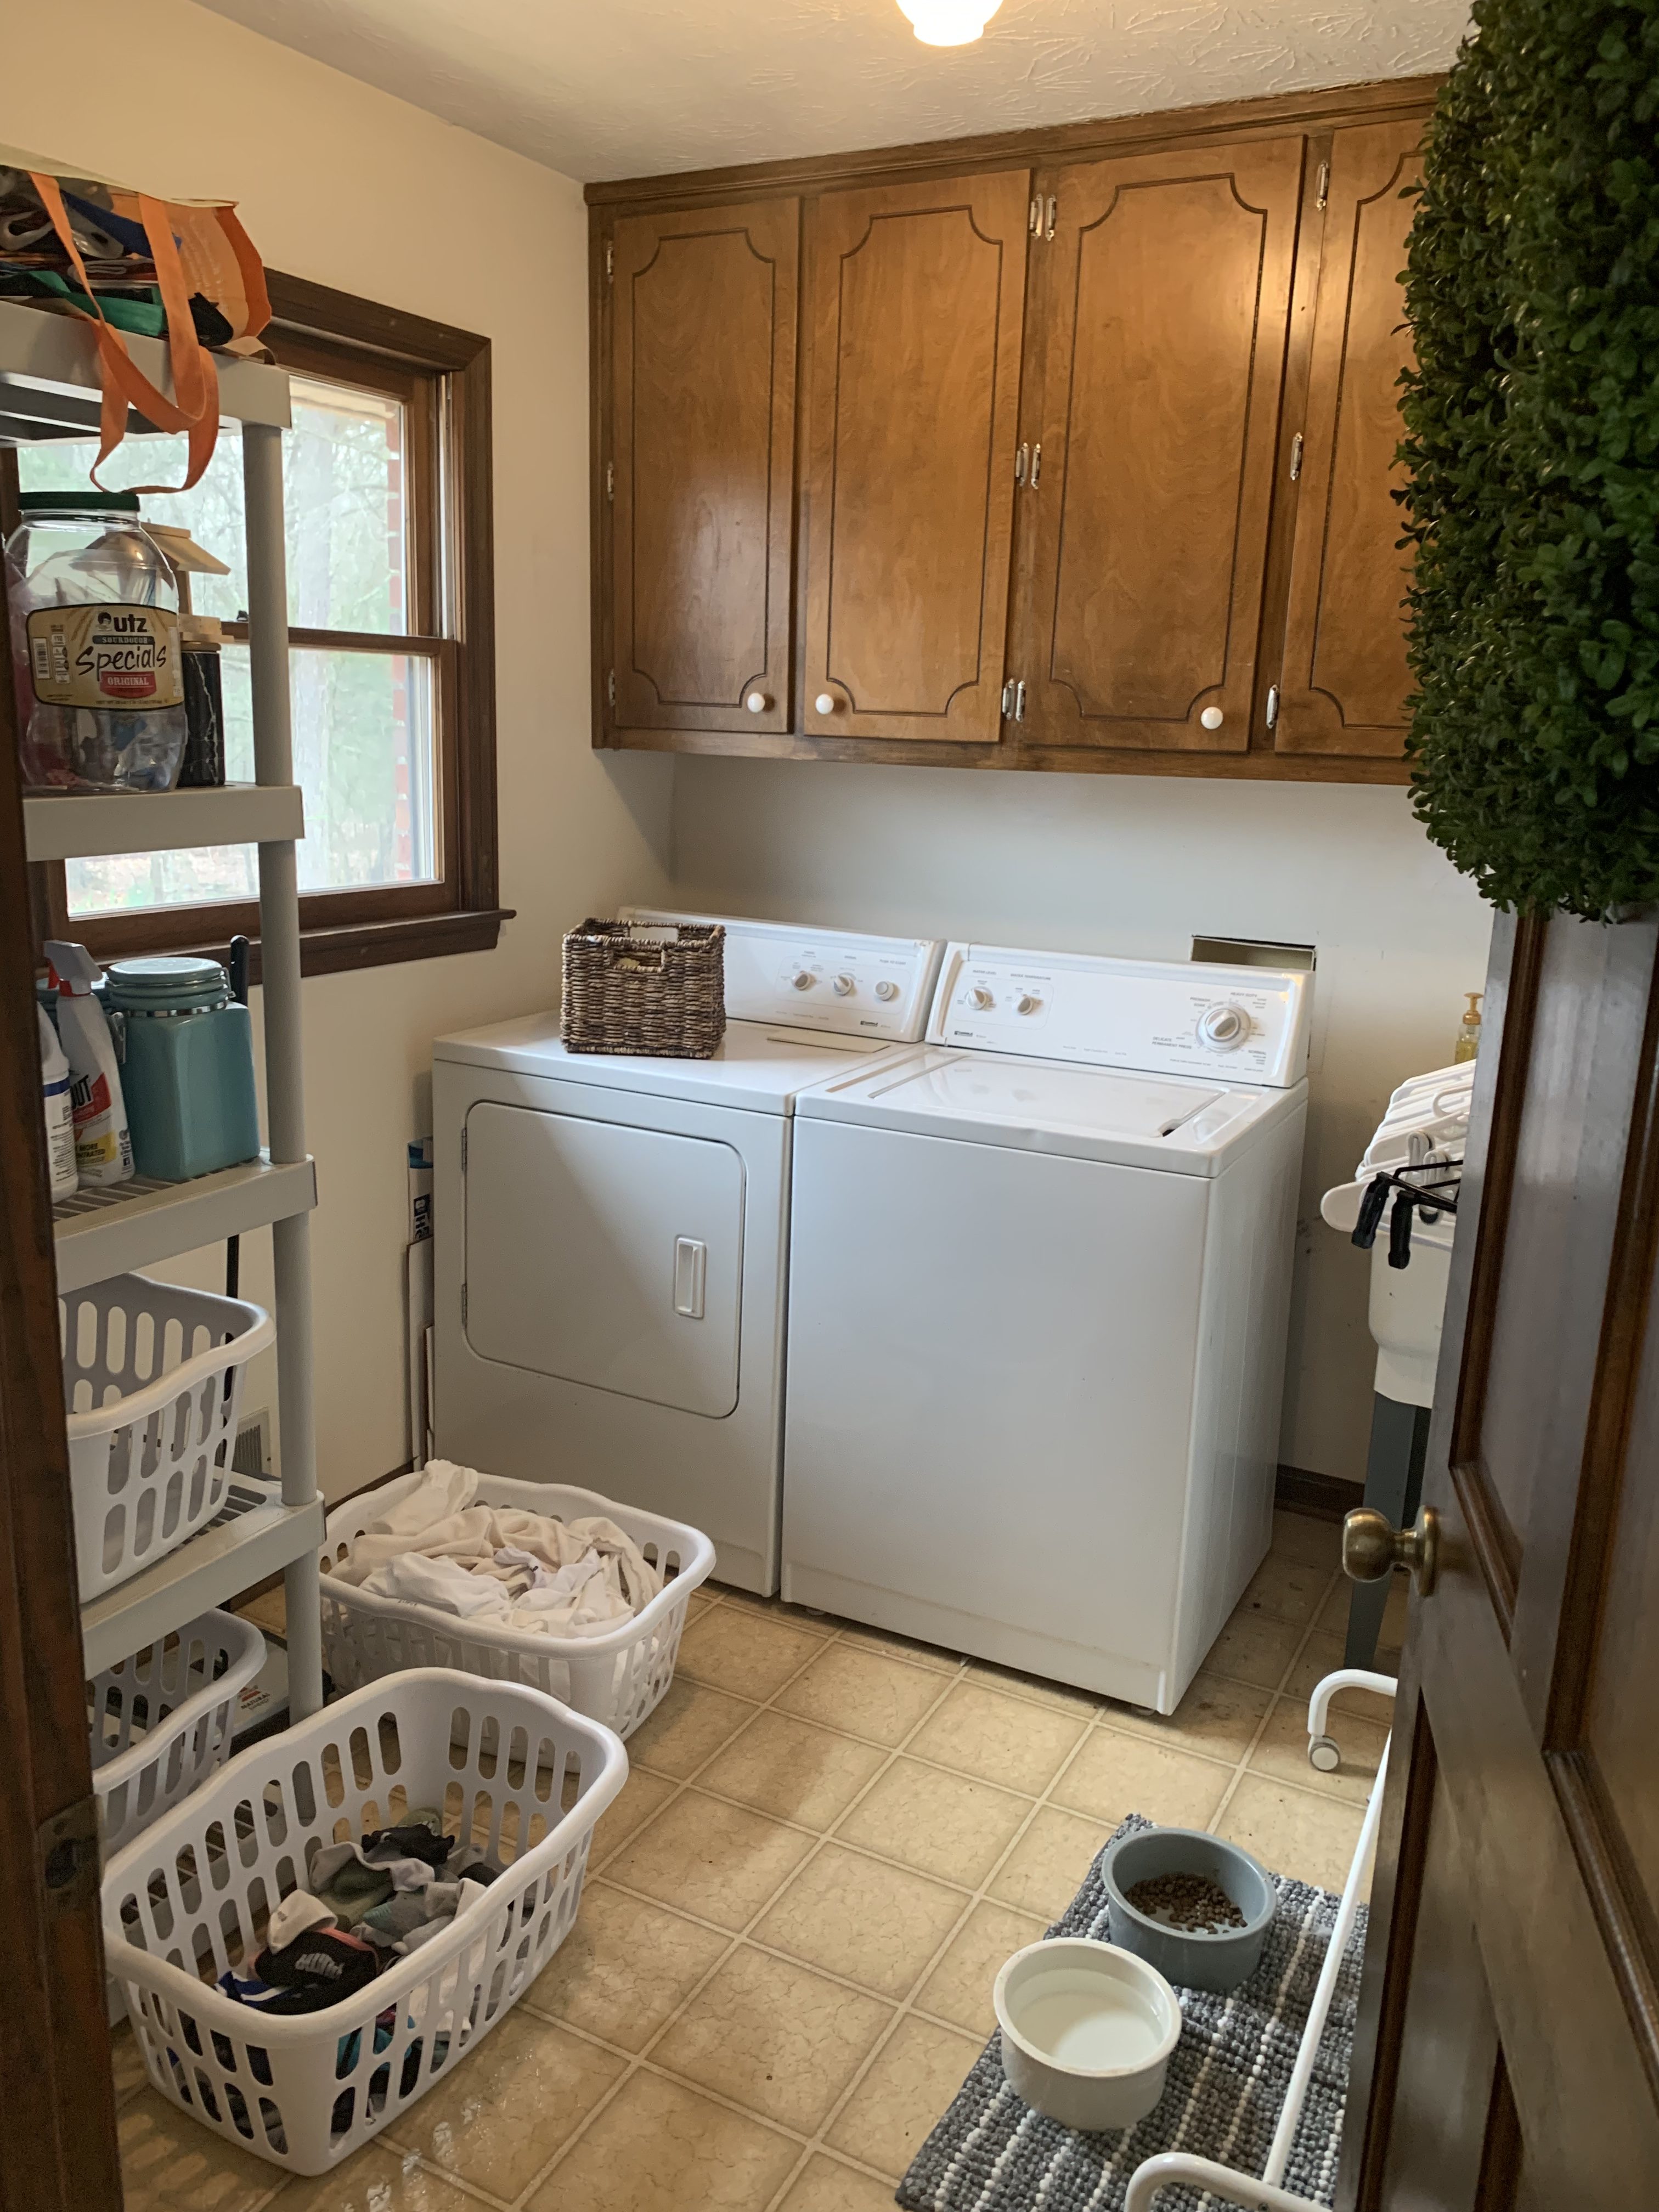
Our laundry room is right off our kitchen, in the heart of the home and it’s usually visible at any given time of the day. I typically leave the door wide open so our dog can access his food and water. Plus, like any home with multiple kids, the washer/dryer is always running . But this meant my newly updated kitchen included an unsightly peek into a room with a dirty, brown linoleum floor. It chided me daily. I knew I had to do something!
Well, like most renovations, there were more projects than our little ole budget could handle.
I’m really into the high-contrast, geometric, modern tile patterns that also happen to be expensive. We could have purchased tile and new cabinetry for the laundry room, but we also need to fix the deck that’s falling off the house ASAP, so….no new tile and cabinetry for now. (Side note: my husband has his own renovation company. However, since our home isn’t a paying job, often times, our renovations must wait, and that’s OK! It’s all about patience and compromise on a fixer-upper.)
We have structural projects that must take budget precedent, but the laundry was still one of my top priorities, purely for its aesthetic reasons. So I had a few of options:
- Wait a couple of years to purchase the tile I really want.
- Buy a cheaper tile that was inexpensive and “meh”.
- Put in a little sweat equity and create the pattern I wanted on the floor.
Obviously, I went with the third option. I realize that it may not be the most elegant, long-term fix, and it may wear and tear a little over time, but I really had nothing to lose. The floor couldn’t get any worse, the project was budget friendly, and I incorporated supplies we already had on hand. And if it does not wear well, then I am back to option 1, replacing the floors in a couple of years.
Plus, I just felt like giving in a try. I just wanted to do something creative and out of the box. Any one else ever feel that way?
The Stencil:
Once I decided for sure that I was going to paint the floor, I had to figure out materials and application. I knew a stencil would probably be the most effective way to maintain a uniform pattern. I couldn’t find one that I liked in the craft/hobby stores, so I opted to make one. Simple enough, right? Well, it was actually a little more complicated than I thought. I knew I had to use the fun geometry formulas to get the pattern to line up correctly, but I couldn’t remember them from a thousand years ago. Thanks to my math-minded husband, we figured it out. And now, you don’t have to do the math — just follow the link for the template!
Click here for Stencil Templates.
I created templates for commonly-sized, square tiles: 6″, 8″, 9″, and 10″. You can use these stencils on ceramic tile (is much easier on ceramic!) or linoleum. More on that later!
The Supplies:
I am pretty frugal when it comes to DIY, so I didn’t purchase any special paints, other than the clear, top coat. In fact, I used the primer and trim paints we had used in other places in our home, and they worked quite well! Here are the paints and supplies I recommend that you use (some are Amazon affiliate links):
- 1 quart* primer. We used this one.
- 2 contrasting trim or exterior paint colors. I used about a half gallon of Benjamin Moore’s Simply White and a quart of Wrought Iron.
- A ruler.
- 1-2 rolls* of Frog Tape. (Don’t buy a substitute or the blue tape! Nothing works as well as the Frog Tape — it’s well worth a little extra expense.)
*The amount you will need depends upon the size of the room.
Creating the Template:
First, you want to measure the size of the tile you wish to paint. The maximum size template we have is 10 X 10. You need to have a small border on the outside of your stencil, so it holds the design together, and it also creates an illusion of grout lines (if you’d like).
You can purchase and download the templates here. One stencil template is $5 whereas you can download all sizes (to use for an unlimited number of projects) for $10. And the best part — no math required! 😉
If you downloaded a 6″ tile stencil, skip this next step. However, if you downloaded a tile size larger than 6″, you will see that the template comes in 2 pieces of paper. I recommend you cut out at least 2-3 stencils. Here is a quick video how we put it together.
OK, so now that you’ve cut your stencils, on to the next step…pick out your floor pattern.
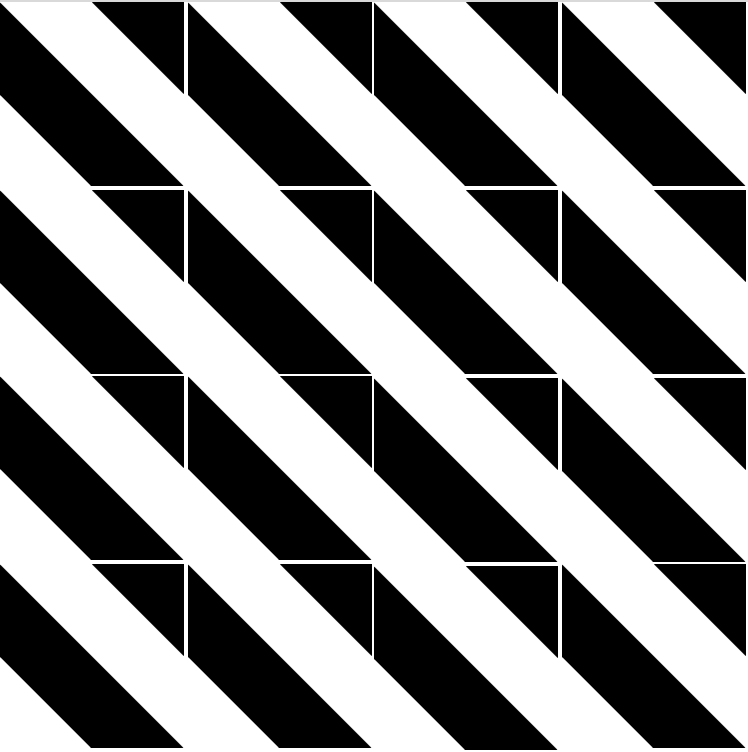
Pick Your Tile Pattern:
This particular stencil is so versatile. You can create so many different looks, as you’ll see below. These patterns are also available on the template download, so you can decide what style works best for you.
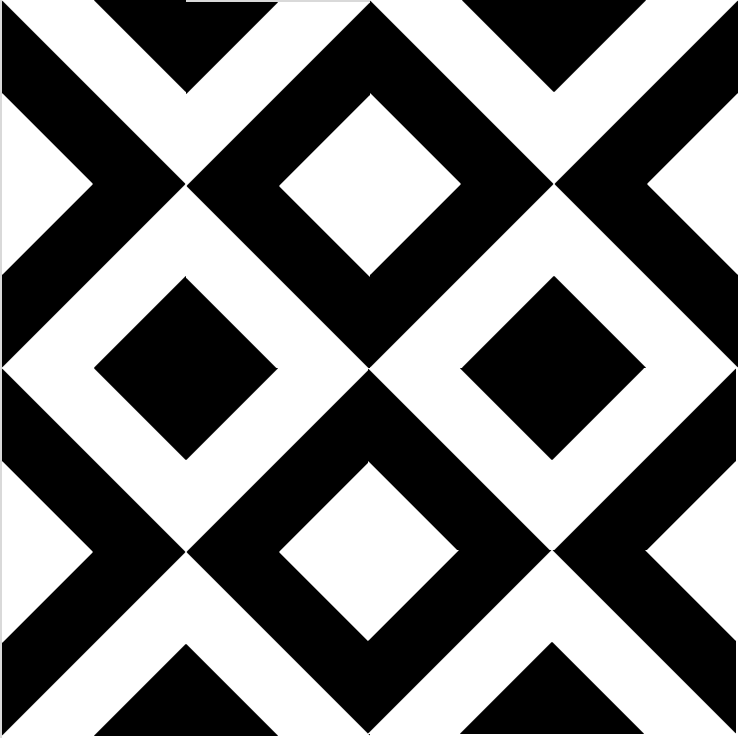
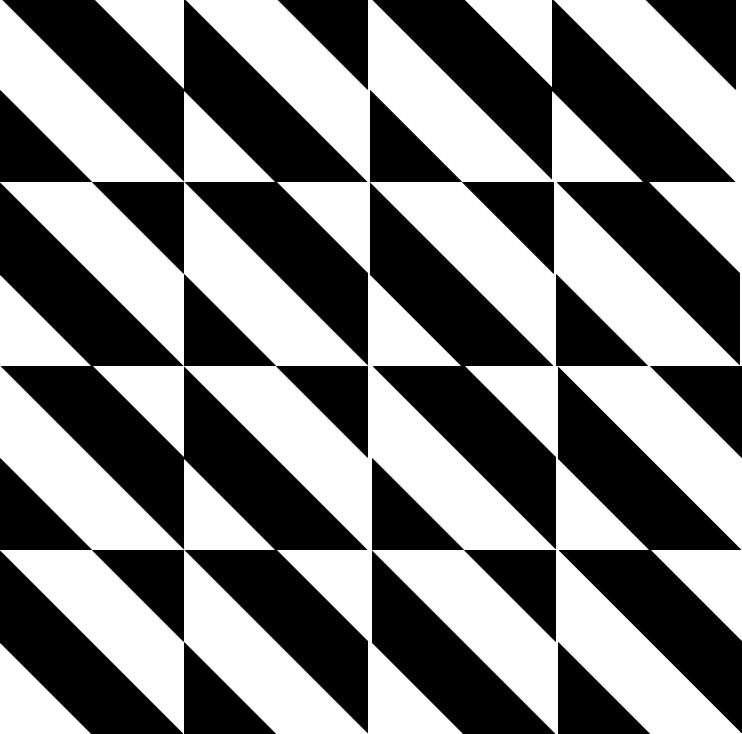
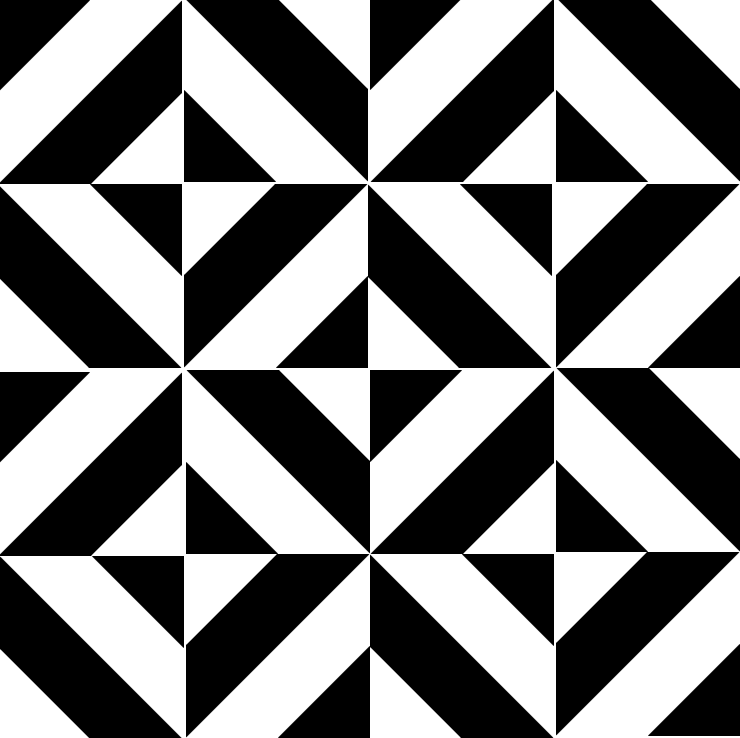
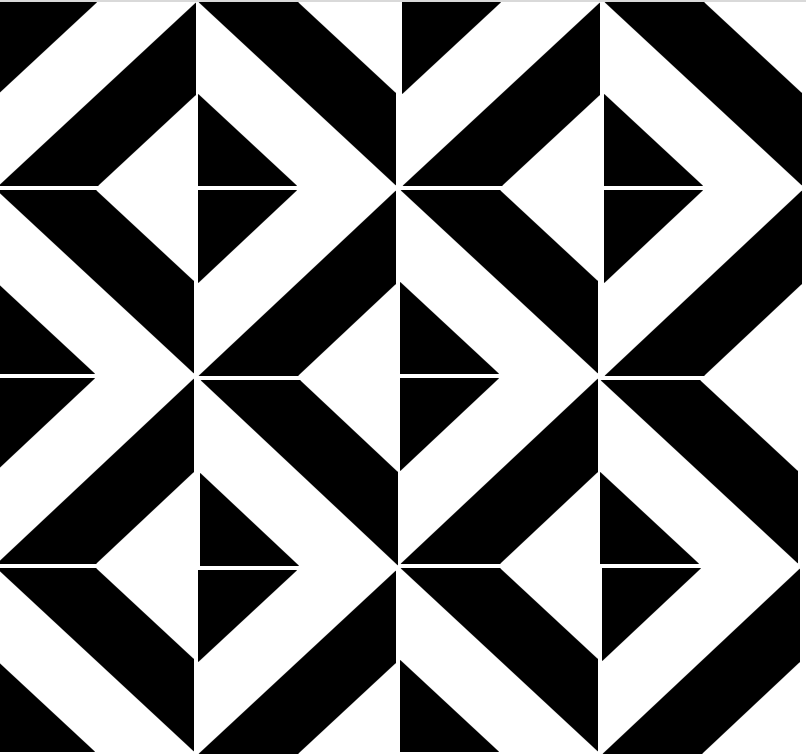
I actually wanted to paint the 4th one down – the Concentric Diamond pattern, but I didn’t pay close enough attention to the layout and thus accidentally went with the last one. It was a happy mistake, though. I’m glad that we ended up with this last design.
Now that you’ve picked your pattern design, head to Part 2 to finish the job!


No Comments